
Easy-to-Setup PPK Solution
Overview
PPK stands for Post-Processing Kinematic. In this workflow, base station data is recorded first and then used later for post-processing on the rover side.
This case study shows a simple PPK workflow built around the NANO RTK Receiver and the RTKBridge Android app.
Required Hardware and Software
- NANO RTK Receiver, currently only V3.5 is supported
- RTKBridge Android app
- Android phone
For V3.5, make sure the firmware is updated to at least 1.0.8.1493.
If it is not, use the online update tool, Online flasher,
or download the firmware and update it from the NANO RTK web page: 1.0.8.1493.
Base Station
Config base NANO
Set the NANO RTK Receiver to Base mode and enable the TCP Server service on port 9009.
Record base raw data for PPK
If the base station is located somewhere with Wi-Fi access, you can use the following method to record the base station raw data.
Download strsvr from RTKLIB , then open it and select TCP client as the input. Set the server address to the NANO RTK Receiver IP address and the port to 9009.
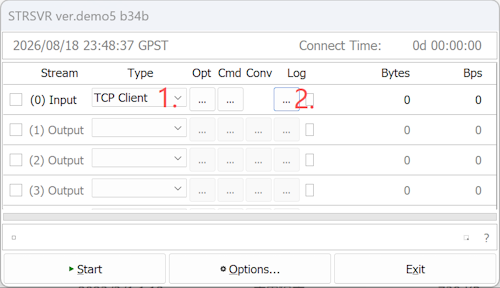
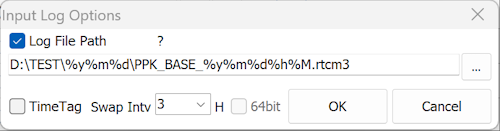
Then click Log and set the save path for the base station raw data. You can use a filename pattern like the one shown below:
D:\TEST\%y%m%d\PPK_BASE_%y%m%d%h%M.rtcm3
Click Start to begin recording. strsvr will save the data according to the filename pattern, where %y%m%d is used as the folder name and PPK_BASE_%y%m%d%h%M.rtcm3 is the output filename.

After everything is confirmed, you can start recording before each field survey. If disk space is sufficient, you can also leave strsvr running continuously.
Rover
Install Android app
Download and install the RTKBridge Android app. It is not yet available on Google Play, so you need to install the APK directly click to download RTKBridge.
After installation, grant the required permissions to RTKBridge.
PPK for field
Open RTKBridge and create a new project.
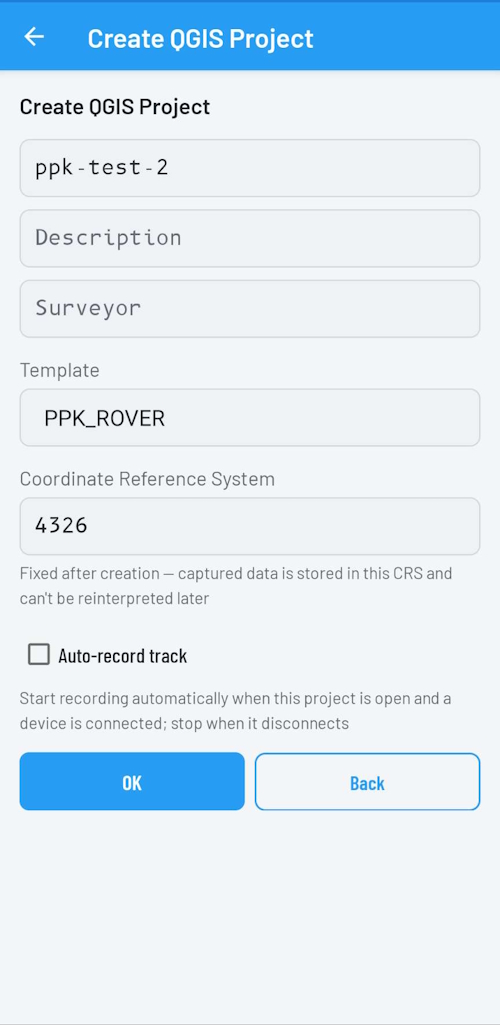
Enter the required project information and set the template to PPK_ROVER. Leave the other settings at their defaults.
Then select the BLE device. Make sure the firmware is at least 1.0.8.1493, which is required for BLE support.
Click the gear icon on the right side of the device to configure it, as shown below.
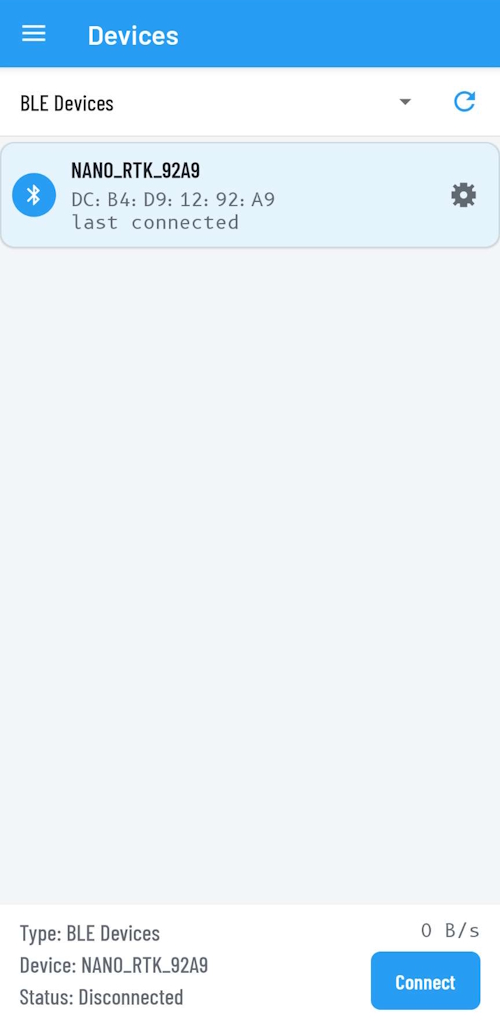
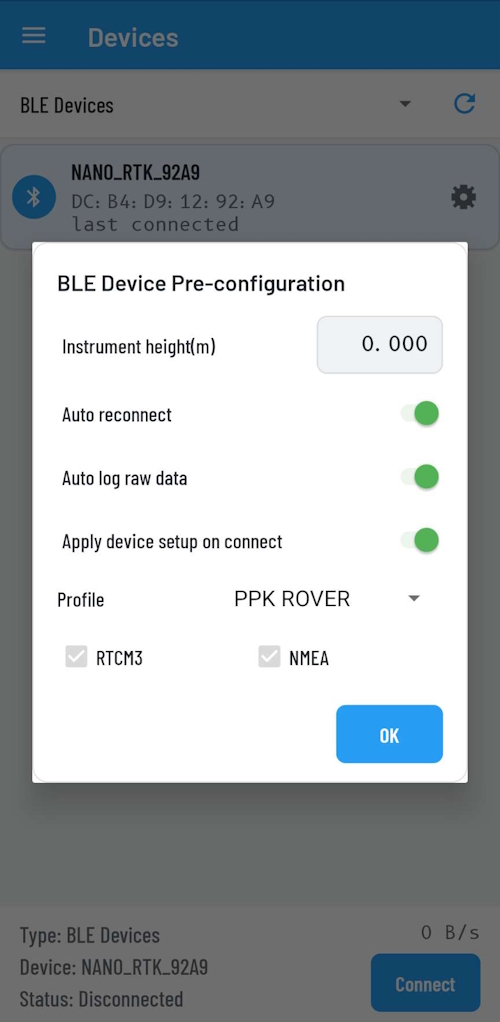
Then connect the BLE device.
After the connection is established, you can start collecting field data.
On the map home page, open the toolbar on the right side, tap the top Feature button, choose point, line, or polygon from the top Feature toolbar, and then use the buttons on the right to start the selection or collection action.
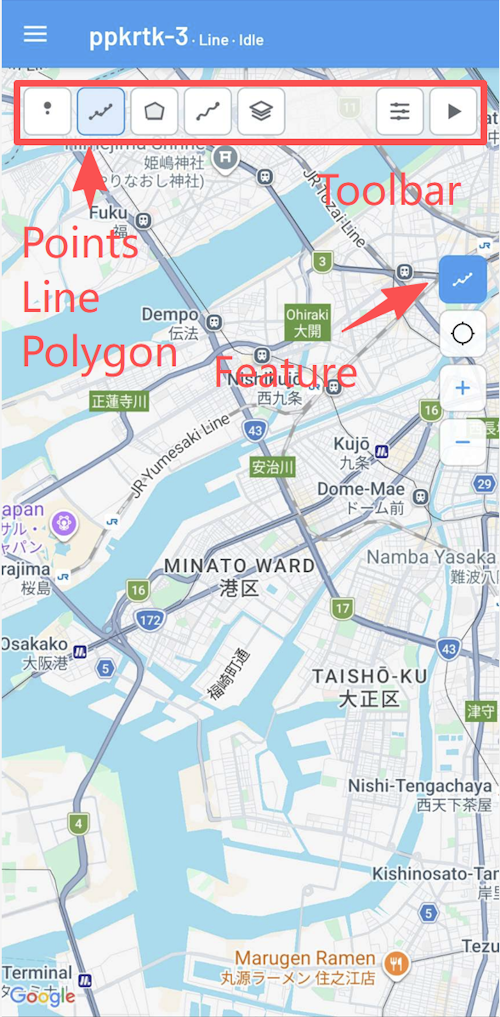
During point, line, and polygon collection, the system will automatically record raw data.
When all data collection is complete, disconnect the device.
PPK Processing
Open the Projects page and click the properties button on the right side of the current project. The interface should look like this:
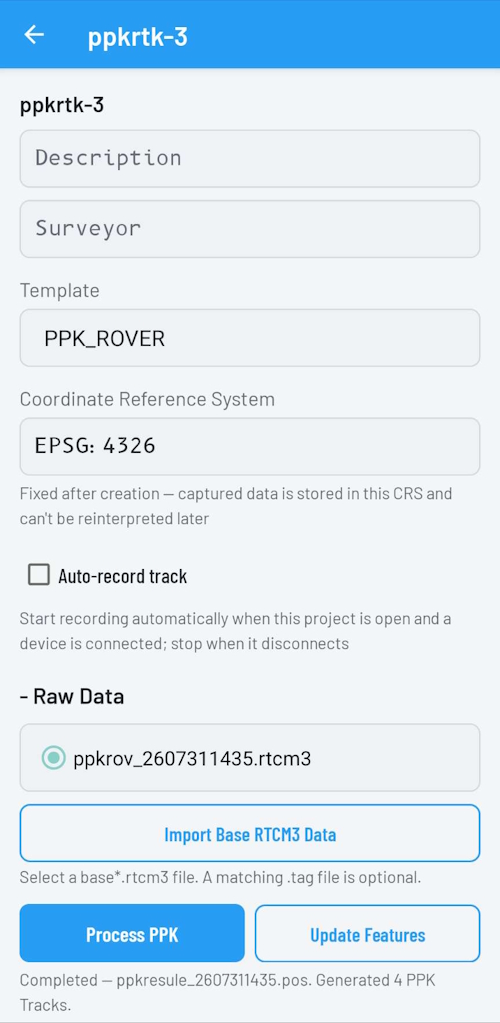
a. Copy the base station RTCM3 file to this Android device.
b. on the screen shown above, select Import Base RTCM3 Data.
c. the Process PPK button below will become active. Tap it to start processing. The progress will be shown below.
Once processing is finished, tap Update Features.
All features in the project that correspond to the processed PPK rover file will then have their coordinates updated.